


Flixanity has become a very popular Kodi add-on, due in large part to its similarities with leading options like Exodus and Covenant. Flixanity has built a solid reputation in the Kodi community, thanks to the fact that it offers the chance to stream content from well-established and reliable sources that are unlikely to fail. In this guide, we’ll find out how to install Flixanity on Kodi. Recently, law enforcement has targeted illegal third-party addons. Although we don’t encourage access to pirated material and suggest that you opt for legitimate options instead, in the end, the decision and the responsibility are yours. One thing to keep in mind though, is that in order to keep your privacy protected, it is important that you use a VPN service.
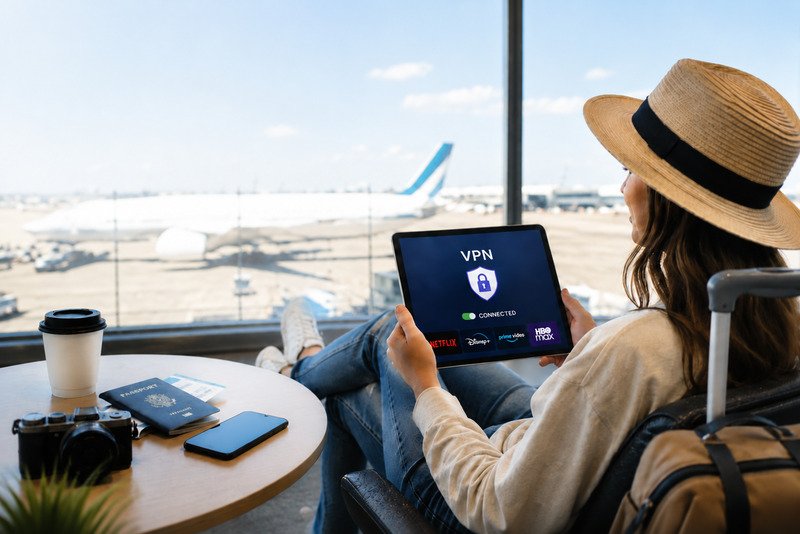
A VPN allows you to keep your information secure and private. It encrypts your entire internet traffic, so your ISP and other parties won’t be able to see what you are doing online. With a VPN, you can also change your IP address, which gives you anonymity and also the possibility of bypassing geographical restrictions. You can connect to servers in different countries and access content that is not available in your location. VPNs are ideal solutions for security, privacy and online freedom.
You will find many different options in the market, but we recommend that you opt for recognized services that offer high quality such as ExpressVPN, NordVPN, IPVanish and PIA. These VPN services provide strong security, fast performance, advanced features to protect your internet traffic and give you online freedom, as well as a great selection of servers to connect to. In addition, these providers don’t keep records of your activities so you can browse, download, stream content and play online games without concerns about your privacy.
Installing Flixanity on Kodi Krypton Version 17
- The first thing you need to do is to open Kodi 17, then click the Settings icon that appears at the top. Then, select File Manager and click twice on Add Source.
- Now, a box will appear on your screen so you can click on . Then enter the URL of the repository http://kdil.co/repo/ and click OK. Then enter the name of the Repository “Kodil” and select OK, until the box saves the source and disappears.
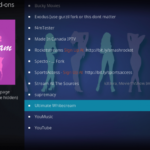
- Now, go back to the Kodi Main Menu, where you will see a list of tabs organized vertically on the left side. Click on Add-ons, then click on Package Installer icon.
- You will be transferred to a different list of options, where you have to click on “Install from Zip File”. Select Kodil> Kodil.zip > allow some time for the repository to be installed.
- Click on then locate and click on Kodil Repository. Select Video Add-ons, Flixanity and then click Install to begin the installation process.
- After the installation is completed, return to Kodi Main Manu, then select Add-ons, followed by Video Add-ons and select Flixanity. Soon you will be able to start watching movies and TV shows.
Installing Flixanity on Kodi Jarvis Version 16
- Open Kodi Jarvis on your system. Select System, then File Manager and click twice on Add Source. You will see a box on your screen and you can click on , then enter the URL: http://kdil.co/repo/ then click Done. You will be asked to provide the repository name. Enter Kodil, click Done and then click OK.
- Return to Kodi Home Screen. Now you can click on System, Add-ons and Install from Zip File. Then select Kodil, followed by Kodil.zip. The installation will start. You can click on Install from Repository, then select Kodil Repository, followed by Video Add-ons, Flixanity and Install.
- You can start watching movies on Flixanity, return to Kodi Home Screen, then Videos, Add-ons and Flixanity. That it all. Now you are ready to start enjoying the content that Flixanity has to offer.
Possible issues with Flixanity and how to fix them
Could Not Connect to Repository
You may come across this kind of error if a user hasn’t entered a repository URL in the right way. It may also occur when the internet connection is not working well or if it hasn’t been established.
How to solve it
It is possible to solve the problem by re-visiting the repository URL. In most cases, Kodi users fail to remember to add an end slash (/) in the URL. In addition, they must check if they are connected to the internet since Kodi retrieves the data on the URL directly from the internet.
Check Log Error
The check log error in Flixanity Kodi can be frustrating and it may make you feel like not using Kodi at all. While this error can affect your Kodi experience in a negative way, you don’t have to stop using Kodi for good as there is a way to fix it.
How to solve it
You can fix this error quickly by changing the repository. You can install an add-on from a different add-on. You just need to find out what repositories can be used for that particular add-on.
Alternative Repositories for Flixanity
Apart from Kodil, you can find Flixanity on other repositories. Below there is a list of the options that you can try:
Super Repo
StreamHub Repository
Alternatives to Flixanity
If Flixanity is not working well for you, there are other add-ons that are worth trying. These add-ons also allow you to watch movies, TV shows and other great content. Check the following selection of Flixanity Kodi alternatives.
Exodus
Bob
Covenant
Genesis
Bennu
Conclusion
While Flixanity is still relatively new, it has become one of the favorite options for Kodi users who want a solution to access a great variety of content. With Flixanity, you will be able to stream TV shows and movies from sources that work well. This add-on is a great entertainment solution, but in order to protect your privacy it is important that you connect to a VPN when you use it.