


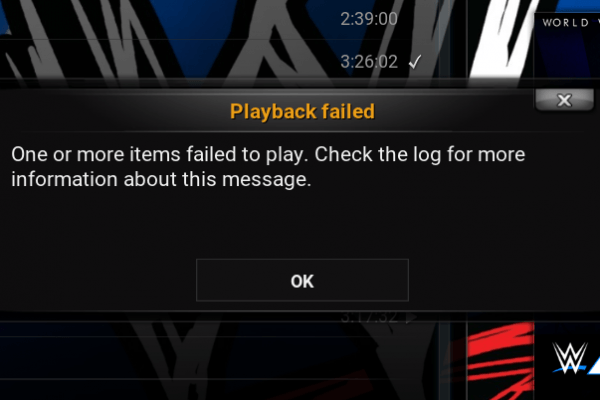
Kodi opens the door to a world of entertainment where it is possible to enjoy movies, TV shows, live sports and much more. While Kodi is a convenient solution to access media content and it usually works well, in some cases, you may come across issues with the app. These are some of the most frequent errors that can affect your experience with Kodi add-ons: “Playback Failed”, “One or more items Failed to Play”, “Failed with Error Code” or Playback Failed (Check Log Information) Error. All these are related and here, we will talk about the solution. If you are using Kodi and face these errors at some stage, check the below tips to fix the problems.
Method 1
It is possible that the error is caused by database obsolete files. In this case, you need to delete the database file on your computer or Android device to fix the issue. Here is what you need to do:
- Go to Kodi settings
- Click on the File Manager
- Click on Profile directory and then, select on DATABASE.
- Under DATABASE, search for an option called Addons.db.
If you are an Android user, go to Addons.db, without the DB.
If you are using Windows, look for %Appdata and open the Kodi, User Data and search for Addon.db file, then delete it.
Method 2
It is possible that the error is related to cache data. Kodi may start displaying error codes when you try to stream content, if the cache data gets filled up. What you need to do in this case is to clear cache so that you can stream content without hassle. Here is what you need to do. Let’s start with the steps for Kodi Jarvis.
- Start by installing Raw Maintenance Add-on
- Launch Kodi and then go to Settings
- In Settings, click on the File Manager
- Next, open Add Source and then click on None.
- Add the URL: http://solved.no-issue.is/
- Click Done and choose a name of the file.
- Click on Home button on Kodi
- Then, under settings click on setting.
- Click on Add-ons
- Click on Install from Zip file and then find the zip file
- Click on maintenance folder and install the zip repository.rawmaintenance.zip
- Then click on Install from Repository under Add-ons.
- Click and install the RAW maintenance Kodi Add-on. That is all.
Instructions for Kodi Krypton v.17
- Select the Settings icon and then open File Manager
- Add source and enter the URL http://solved.no-issue.is/
- Next, go to home page and click on Add-on. Then click on the box icon that appears at the top.
- Then click on install from .zip file. Find the file under maintenance folder and install the repository.rawmaintenance.zip
- Then, click on Install from Repository and click on RAW Maintenance Kodi Add-on.
- Last, but not least, open Program Add-ons and install the Raw maintenance.
Method 3
Another solution is to adjust the settings in Kodi to make them compatible with device software and hardware. This will provide the best possible combination for a smooth streaming experience. The first part of this method is to install the Ares Wizard.
- Click on Settings and then open File Manager
- Click on Add source and then enter this URL: http://repo.ares-projcet.com/magic/
- Return to the home screen and select Add-ons. Click on the box icon on the top left.
- Click on Install from the zip file, then find the file: repository.aresproject.zip and then click on it. If you have problems at the start, re-install.
- Click on Install from Repository and then on Ares Project.
- Then, open Program Add-ons and install the Ares Wizard.
How to use the Ares Wizard
1. Go back to the Home Screen
2. Select Program Add-ons and open Ares Wizard
3. Click on Tweaks on Ares Wizard
4. Now, click on Advanced Settings Wizard
5. Now click on Next, then select Generate Settings and Apply the settings. This will create a .xml file.
6. Restart the Kodi app to ensure that the changes are applied.
Method 4
It is also possible to fix the issues by downloading a previous version of Kodi. All you need to do is to do the below:
1. Go to Kodi’s website: https://kodi.tv/download
2. Look for Older releases and click on this option
3. Then, select your operating system. For Android, use ARM
4. Search the option called Old and select it
5. Download an older version and that is all.
Method 5
You can also fix the issues by forcing update on the Add-on. Here is how:
1. Go to the Settings
2. Open the File Manager
3. Find the issue causing Add-on
4. Open the Add-ons and Update the file. You will need to force update, even if you have the latest version. This should solve the issue.
Method 6
If the streaming issues are due to geographical restrictions, the best solution is to use a VPN. This technology allows you to overcome restrictions by changing your IP address, giving you the chance to appear as if you were in a different location. An additional advantage of using a VPN is that it encrypts your data, protecting it from snooping and hacking. There are many options available that scan be used on your PC or Android mobile device. The options include ExpressVPN, Surfshark, NordVPN, Ivacy and CyberGhost.